Tire pressure can be confusing.
If you run too high of pressure, you are in for a rough ride. Too low of pressure, and you run the risk of damaging your rim, or worse, blowing your tire off the wheel.
So how do you determine the right tire pressure?
Today we’re going to tackle just that. Here is my ultimate guide to mountain bike tire pressure.
How to Choose the Right Mountain Bike Tire Pressure
Before you start messing around with your tire pressures, it’s essential to understand what it is and how it affects your riding experience.
(Love mountain biking? Learn what to wear on every ride to make sure you have the best time possible here.)
Disclaimer: This page may contain affiliate links.
What is Tire Pressure
Tire pressure refers to the atmospheric pressure, the amount of air inside of your tire.
Tires need a certain amount of air in them to hold their shape, roll effectively, and provide traction. You can alter how a tire behaves by slightly changing the amount of air inside it.
North Americans measure tire pressure in pounds per square inch (PSI). Europe and the rest of the world use bar, the metric unit, for pressure.
Since I am in the US, I will be referencing PSI for the remainder of this article.

Why Does Tire Pressure Matter?
The essence of a mountain bike is the two wheels that it rolls on. Tire pressure matters because it is a variable that affects how your wheels roll.
If you add too much air to your tires, they will roll very fast but will sacrifice traction and trail compliance.
If you don’t add enough air, your tires will roll very slow and run the risk of coming off of the rim.
Each wheel and tire combination has a tire pressure sweet spot with a 3-5 psi margin either way. This sweet spot gives the tire the correct shape, a good amount of traction, and rolling resistance.
Finding your right tire pressure is the key to having the best experience on the trail. But often, this is easier said than done.
Mountain Bike Tire Pressure Calculator
Mountain Bike Tire Pressure Chart
| Weight x Tire Dimensions | 26 x 2.2-2.3 | 26 x 2.4-2.6 | 27.5 x 2.2-2.3 | 27.5 x 2.4-2.6 | 29 x 2.2-2.3 | 29 x 2.4-2.6 |
| 100 | 24 | 21 | 21 | 20 | 21 | 19 |
| 110 | 25 | 22 | 22 | 21 | 22 | 20 |
| 120 | 26 | 23 | 23 | 22 | 23 | 21 |
| 130 | 27 | 24 | 24 | 23 | 24 | 22 |
| 140 | 28 | 25 | 25 | 24 | 25 | 23 |
| 150 | 29 | 26 | 26 | 25 | 26 | 24 |
| 160 | 30 | 27 | 27 | 26 | 27 | 25 |
| 170 | 31 | 28 | 28 | 27 | 28 | 26 |
| 180 | 32 | 29 | 29 | 28 | 29 | 27 |
| 190 | 33 | 30 | 30 | 29 | 30 | 28 |
| 200 | 34 | 31 | 31 | 30 | 31 | 29 |
| 210 | 35 | 32 | 32 | 31 | 32 | 30 |
| 220 | 36 | 33 | 33 | 32 | 33 | 31 |
| 230 | 37 | 34 | 34 | 33 | 34 | 32 |
| 240 | 38 | 35 | 35 | 34 | 35 | 33 |
| 250 | 39 | 36 | 36 | 35 | 36 | 34 |
Front tire is -2 psi from the chart.
How to Calculate the Right Pressure
There are a lot of factors that go into determining the right tire pressure for you. The calculator below is a great starting point.
You should also make sure you have a quality bike pump, and if you really want to nerd out, a tire pressure gauge.
I recommend that you first use the calculator. Then read the following information about the other factors that influence tire pressure.
Tubes vs. Tubeless
The first thing you need to consider is, are you running a tubeless setup or tubes? Tubeless has a host of benefits including, better puncture resistance and lighter overall weight. But the best benefit of all is that you can run lower pressures in a tubeless tire.
If you are running a tube, you will have to run slightly higher pressures to keep the tire’s shape.
If your rim is tubeless compatible and you haven’t made the switch yet, I highly recommend it. Kits like this one have everything you need to convert your bike, making it super simple to convert to tubeless.
Look at your Tire Casing
Not all tires are created equal. Most manufacturers offer the same tread pattern in a variety of different casing options.
Tire casing refers to how thick the rubber is on a tire. The tire casing information is displayed in TPI (threads per square inch), referring to the cord gauge’s thickness. The lower the number, the thicker the casing, and the more durable it is. A higher TPI is lightweight with a more supple ride.
Further, there are also single-ply and dual-ply tires. Dual-ply tires have two sheets of rubber and are gravity-oriented. One-ply tires have one sheet of rubber and are the most common type of tire.
You can run tires with a thicker casing a little softer than tires with a lightweight casing. The extra rubber helps the tire hold its shape and protects against pinch flats.
Consider the Tire’s Size and Width
You can run lower pressures in big and wide tires. This is because the more surface area you have, the more your weight is displaced across the tire. You also have to run more air in smaller, narrower tires.
For example you can run a 29 inch x 2.6 tire at a low pressure, say 24 psi with no worries.
However, a 26 inch x 2.3 tire will need closer to 30 psi to hold its shape.
Think about the Terrain
Next, you want to think about the terrain you are riding.
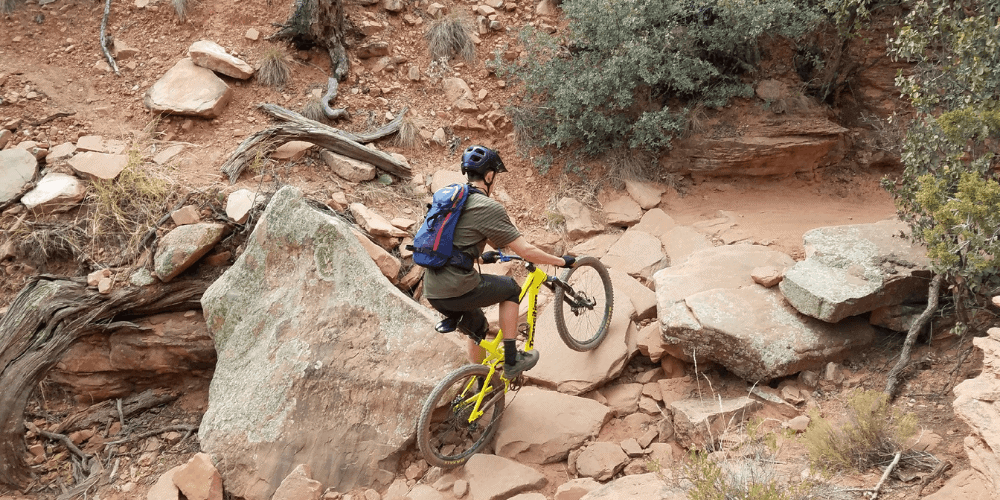
If you’re riding in rocky terrain, think BC or Utah, run slightly more pressure. When I say slightly, I mean 1-3 extra psi. Extra pressure will protect your rim and keep you from pinch flatting.
When on smoother terrain, think the Pacific Northwest. You can run slightly lower pressures since there aren’t as many rocks.
Also, think about the speed. If you’re riding in the bike park where the average speed is a lot higher, run a couple more PSI. But if you’re out on a flatter trail ride, don’t be afraid to keep it low.
Consider Your Ability
Lastly, consider your ability.
If you’re new to the sport, you can get away with lower pressures. Lower pressures will give you more grip and help you feel confident in the corners. I often see new riders running their tires way too hard, don’t be afraid to drop some pressure.
However, if you’re a shredder, you should run your tires a little harder. This goes back to the speed conversation. You will likely be hitting obstacles at a higher speed than most, so you will need that extra pressure to keep the tire’s shape.


Comments are closed.